
It is what happens next that I’m
interested in here.
Smaller bits, pieces with blemishes
like knots, cracks and old screw holes can go into the bin. From there they can
become kindling or simply go to the dump. In my case I try to keep what remains
in more-or-less organized piles, according to the wood type.

What next? Well, one solution I have
developed is the making of trays, cheese boards and similar pieces. One can
even make them in sets, which saves a lot of re-setting of equipment. Here,
step-by-step is the process for a set of trays, each unique in terms of wood
types, laminating pattern and size.

Even the least promisiing pieces have potential. Both of these ended up as parts of a tray.
Laying out the lengths in a rough
pattern is a good place to start. It can be fun to choose attractive colours and wood textures.

Once that has been done it is essential to makes sure that
each piece is squared up, which is done on a jointer. Two sides are set first.
The other two can be matched in a planer.

Safety first is the cry here. No fingers, sleeves or other bits anywhere near these fast-spinning blades.
-->
Now the gluing
can begin. I like to use newspaper between the work, the clamps and the cauls. It makes things much easier later on. 

The
cauls are essential. Without them the laminated wood strips will buckle. For
those who have not met this word before in the context of woodwork, you are like
me, until about two years ago. Before that the only meaning for caul that I knew of was the membrane
that sometimes lies over the head of newborn babies and is supposed to bring
good luck. Of course I checked the dictionary and there is another meaning. My Concise OED has this: “ a woman’s close-fitting indoor head-dress.” How these
two definitions have been adopted into the woodwork lexicon is beyond me.
 While the tray base is drying the
handles are jointered, measured, cut and glued. The wood vise is an ideal place
to glue them, but here it is really important to use newspaper. Without it the handles could become part of the vise. Tricky!
While the tray base is drying the
handles are jointered, measured, cut and glued. The wood vise is an ideal place
to glue them, but here it is really important to use newspaper. Without it the handles could become part of the vise. Tricky! After the glue has set the excess glue needs to be removed.
 Now one can make things really smooth with a thickness planer.
After that the orbital goes to work, taking the board through 80, 120, 150 and eventually 220 grit smoothmess.
 After the base planing the sides, which had also been made earlier, are glued in place.
When all that is dry the shooter board comes up from its hiding place under the saw and is used to cut everything at right angles.
-->
The handles provide some more
opportunity for creativity. There is also one practical element. By laminating
two different woods one prevents the handle from splitting.

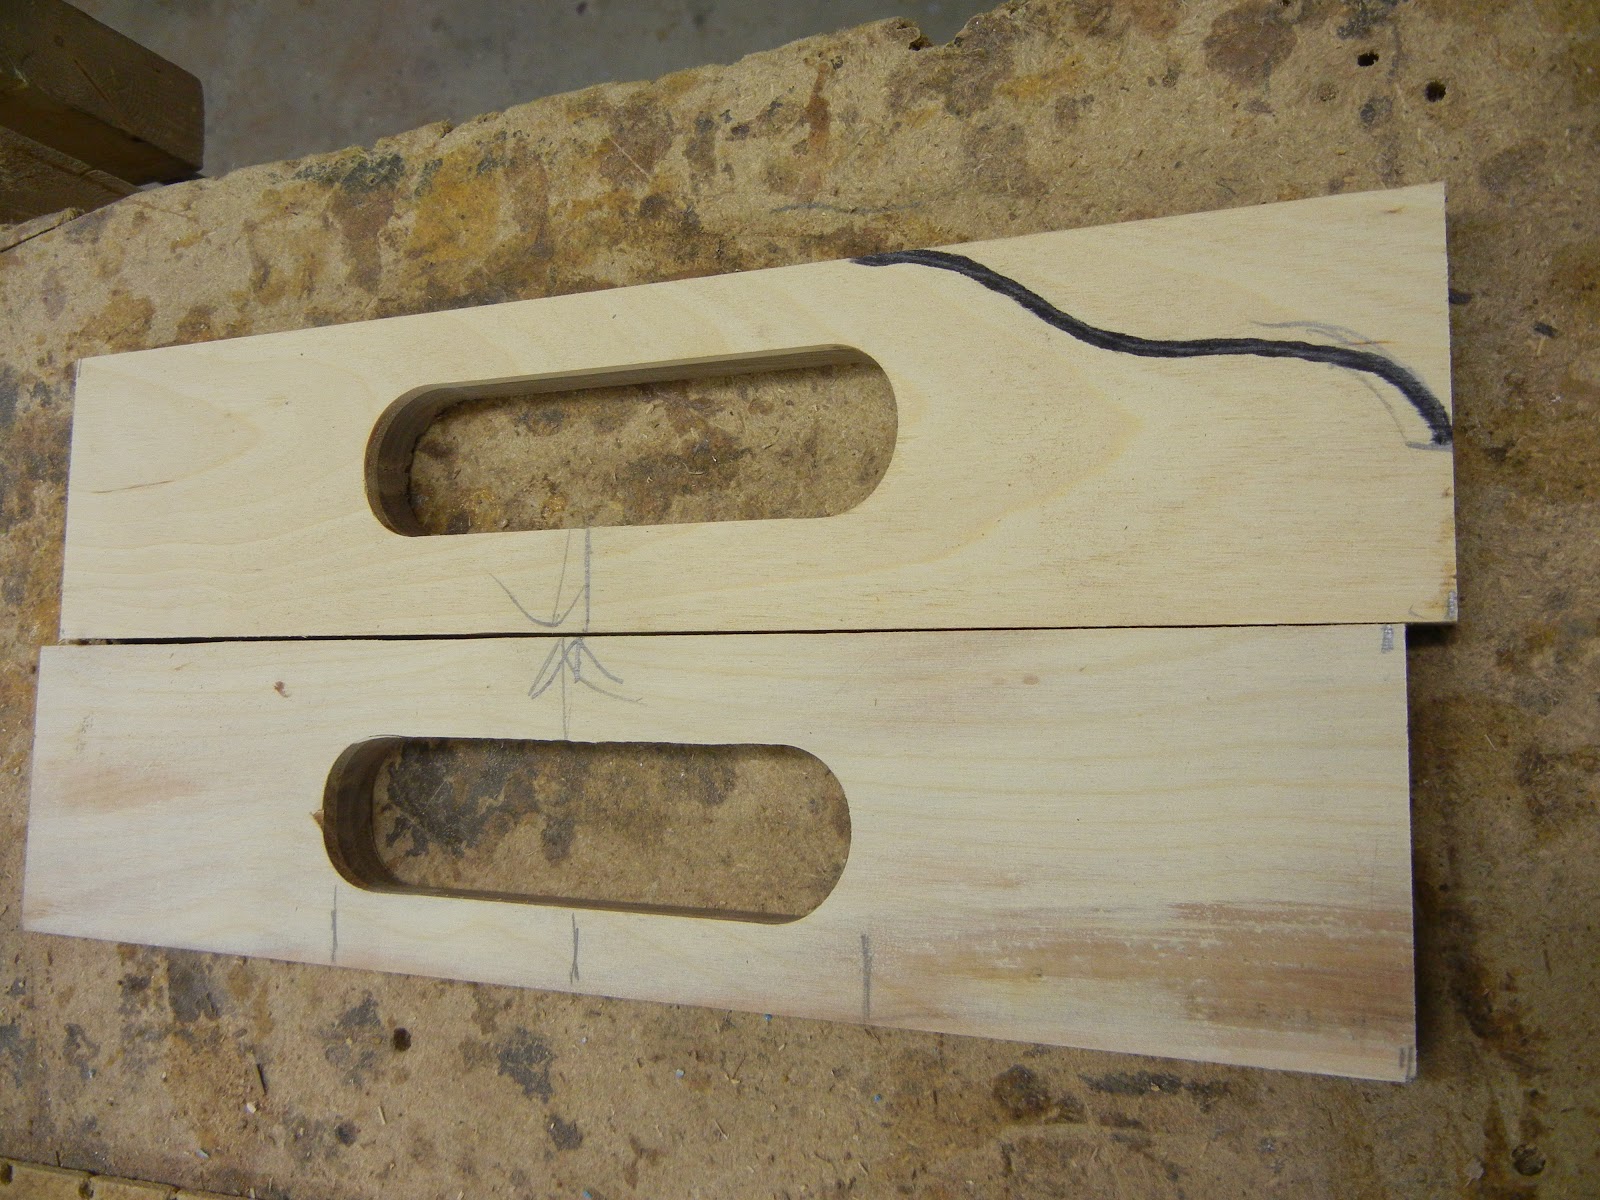
I use the router table to make the holes
in the handles and then to shape their edges and the base of the tray.
 One also can make different shapes. I
like to do this with a scroll saw.
One also can make different shapes. I
like to do this with a scroll saw.  With the first end shaped, it is easy to
make the other three and then sand them all to accurate matches.
With the first end shaped, it is easy to
make the other three and then sand them all to accurate matches.
 I like it, but of course hand sanding gives the final touches.

Contoured edges give the handles a nice feel. This is done with the router and again smoothed off by hand.


With several trays nearly ready it is time for some gluing and scraping,
more sanding and finally staining.
Gifts for friends, charity raffles,
retail sales. There are lots of possibilities, and all from scraps.
 |
| walnut, birch, maple, mahogany, purple heart, paduque, fir, hickory. |
No comments:
Post a Comment